Getting Started
Table of contents
Download
Download the latest version of ProSheets.
Install
Compatibility
- Windows 7, 8, 10 and 11.
- Revit 2017, 2018, 2019, 2020, 2021, 2022, 2023, 2024, 2025, 2026.
Prerequisites
- Admin permissions.
- PDF24 (the compatible version will be installed automatically. Don’t install it manually).
# Remarks
- The installation is done per-machine.
- %ProgramData%\Autodesk\Revit\Addins\
Standard Installation
This method is ideal for individuals with admin permissions who want to install ProSheets on one computer.
-
Run ProSheets installer.
-
Select the Revit versions and click ‘Install’.
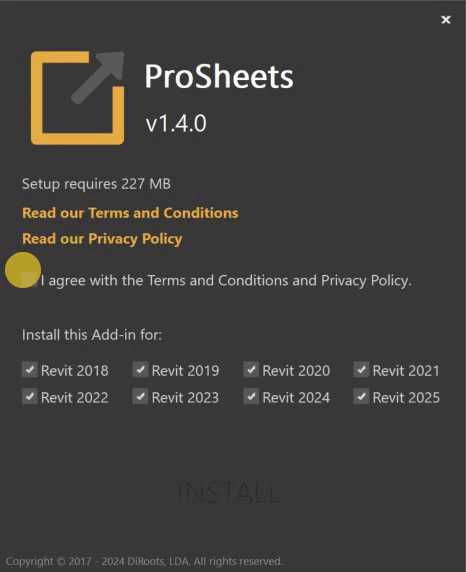
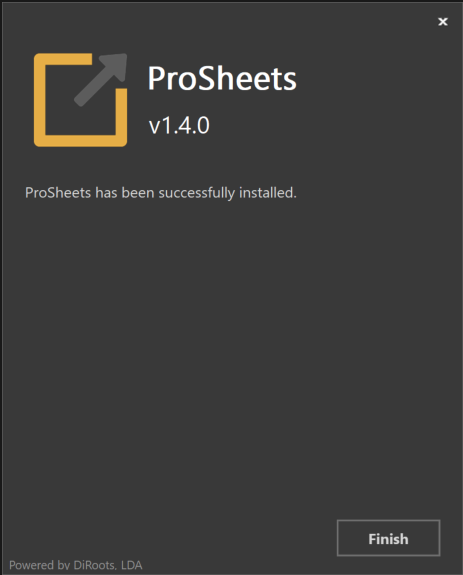
- Wait for the installation to complete and click ‘Finish’.
- Restart your computer. Don’t Skip this step.
Silent Installation
This method is ideal for IT administrators who want to deploy ProSheets to multiple computers.
- Install for all compatible Revit versions.
# This method will silently install ProSheets for all compatible Revit versions.
<installer-name>.exe /i // /qn accept_eula=1
- Disable automatic check for update (i.e., users won’t be prompted to install updates).
# In this example, ProSheets will be installed with the automatic update feature turned off.
<installer-name>.exe /i // /qn accept_eula=1 UPDATER="FALSE"
- Exclude specific Revit versions.
# In this example, ProSheets will NOT be installed for Revit 2017, 2018, and 2019.
<installer-name>.exe /i // /qn accept_eula=1 revit2017="" revit2018="" revit2019=""
- Skip PDF24 install. Warning: You will only be able to export to PDF using the native Revit PDF exporter, which is available only in Revit 2022 or newer and requires a ProSheets Premium license.
# In this example, ProSheets will be installed without PDF24
<installer-name>.exe /i // /qn accept_eula=1 INSTALL_PDF24=""
Uninstall
Using the installer User Interface
-
Run ProSheets installer.
-
Select and click ‘Remove’.
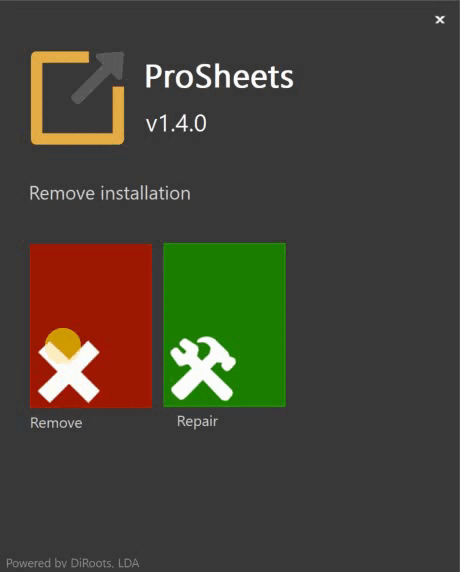
3 . Wait for the uninstallation to complete and click ‘Finish’.
# Remarks.
PDF24 shipped with ProSheets won't be uninstalled. If you want to remove it, uninstall it manually.
Using the installer silently
Uninstall ProSheets without user interaction.
# This method will remove ProSheets from your computer.
<installer-name>.exe /x // /qn
From the control panel
-
In the search box on the taskbar, type Control Panel and select it from the results.
-
Select Programs > Programs and Features.
-
Press and hold (or right-click) on the program you want to remove and select Uninstall or Uninstall/Change. Then follow the directions on the screen.
Updates
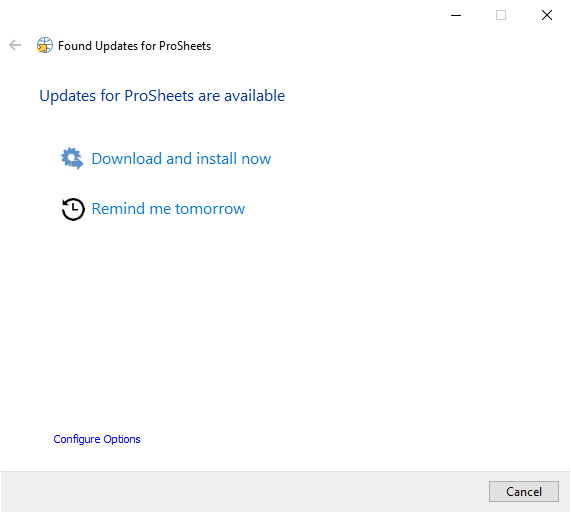
ProSheets includes an updater to help you keep it up to date. The updater will:
- notify you whenever a new version is released (the action is triggered on Revit close event).
- ask you to install now or to remind you tomorrow.
Updater Settings
The following Update Options can be tweaked:
- activate automatic updates.
- check for updates frequency (the default value is 2 days).
- change the downloads folder.
# Pro Tip for Users
By default the automatic updates can't be disabled.
To go around it, you can set up the check for updates frequency to 365 days, for example.
# Keep in mind that it' recommended to keep your apps updated. Plus, we do not provide support for outdated applications.
# Pro Tip for IT Administrators
By default the automatic updates can't be disabled.
To go around it, there's a configuration file that can be tweaked.

# Steps required
- go to %programdata%\DiRoots.ProSheets\Settings
- open the 'updater.ini' file
- Search for the line 'CheckFrequency=2' and change the value to 365, for example.

# Keep in mind that it' recommended to keep your apps updated. Plus, we do not provide support for outdated applications.